Adding the integration to a client
Getting startet on a new client:
Our api uses the OAuth 2.0 Client Credentials Grant flow , and to get started on a new client you need to get a unique clientkey from the client. A user on the client is responsible for activating your integration on the client, thus concenting to giving your integration read or write acces to the client via our api's.
The user on the client must either have the role of an administrator, or have the user privelige "settings -> Organization" in order to activate the integration. There are two main routes to activate an integration on a client in Go, see below.
Onboarding from your end:
If your integration implement our onboarding solution, the process of activating your integration on a Go client can be started from your system/website.
This onboarding workflow is a process that is initiated in your end (your system), allowing a user to login to Go and accept onboarding and activation of your integration for the relevant client(s) the user have access to. The end result of the onboarding is that your integration is activated on the client(s), and the client key(s) returned to you in a secure manner abstracted from the user. Meanwhile, the user is redirected to an url of your choosing.
Onboarding manually from Go:
Public integrations:
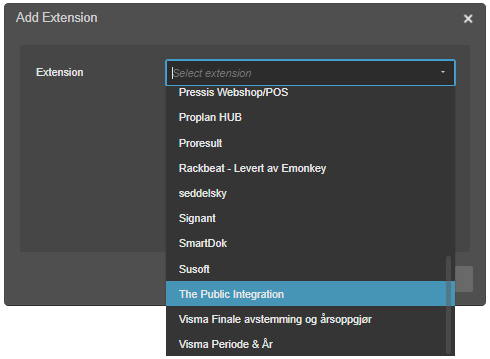
A public integration will be directly visible and searchable by name in the list of integrations in the Go user interface, when the user want to activate the integration on the client. The user navigates to Menu -> Settings -> Extensions -> Add extension, and find your integration by name.
Internal (private) integrations:
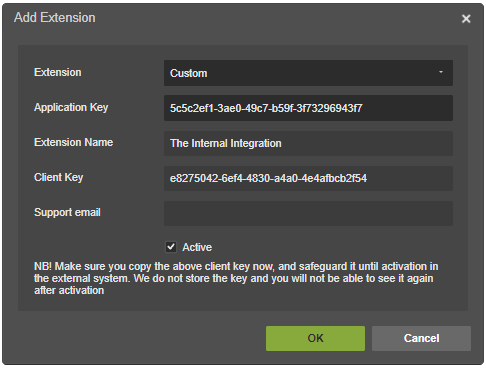
Internal integrations, not meant public/commercial use, will not be directly visible and searchable by name in the list of integrations in Go. The user then need to add a "Custom extension" when navigating to Menu -> Settings
-> Extensions -> Add extension.
A "Custom extension" require that the user inputs the application key. This means that you will need to supply the client user with the application key in order for the user to activate your integration.
Exposing application privileges:
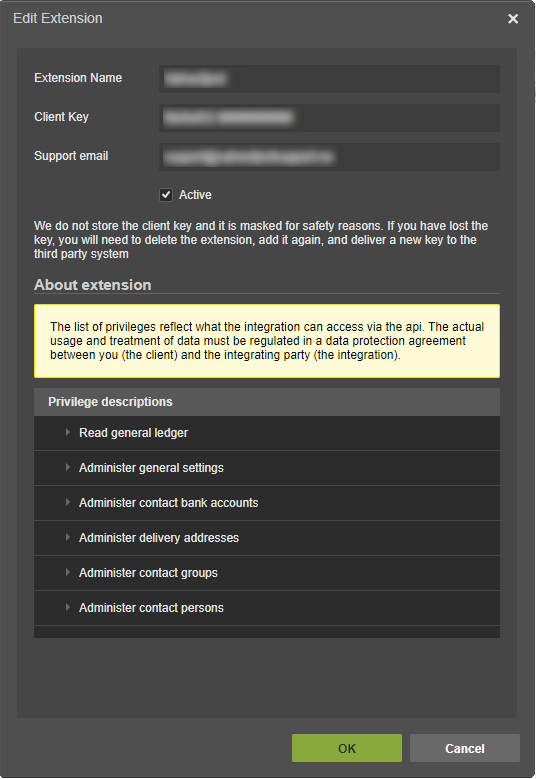
Please note that the access privileges of an integration are clearly displayed to the client in the "Add New Extension" or "Edit Extension" dialog within the GO UI. This feature is designed to inform the client about the specific data in Go that the integration will access upon activation. The user must then determine whether to grant the integration permission to access and potentially modify client data. This approach encourages both PowerOffice and the integration partner to ensure that privilege access is granted only at a minimal and necessary level.
The full list of privileges and their description can be found here.
Security - client key delivery:
Regardless of public/internal state, the user will be presented with window with the client key visible. It is important that the client key is copied and stored in a secure manner, before the user press "OK" and activate the integration. When the window is closed and the integration activated, the client key is salted and hashed by the system, and will be masked. It is not possible to retrieve the client key again from Go, once activated. Should the client key be lost, a user need to delete the integration and reactivate it on the client in order to generate a new client key.
The client user should deliver the clientkey to you in a secure manner, preferably not by e-mail and if so encrypted with the key and encryption password sent separately. If the client can login directly into your system an paste the clientkey in their settings, this is a viable option. All parties need to consider the clientkey a secret, and treat it as such. This also means that you should mask the clientkey in your user interface, if the user can manage integration settings in your system.
Adding additional accounting clients:
Once you get access to our demo environment, the API team will provide you with a new accounting client. However, if you are in need of several accounting clients, you can easily create a new client in Go by clicking the client selector and pressing the "Add new accounting client" button.
The client selector is always located at the top of the screen in PowerOffice Go, next to the menu button. It will always display the currently active client. Below the dropdown list, you can see all your available clients. In this interface, you will find the "Add New Accounting Client" feature, which creates entirely new clients in Go.
Note that for each new client added, it is necessary to configure the integration within the settings, as outlined in the previous chapters regarding client integration onboarding.

Adding demo data:
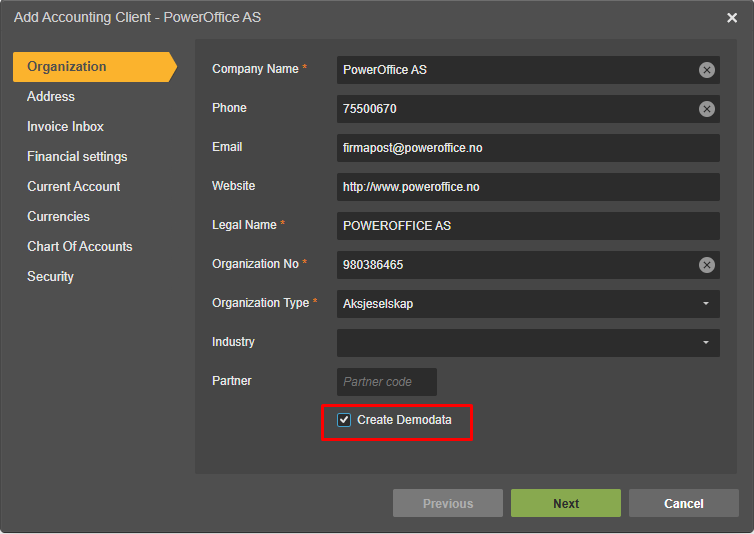
You can easily add demo data to the client before activating it by check marking the "Create Demodata" check button. When activating the client, the demo data will shortly be added to the client automatically.
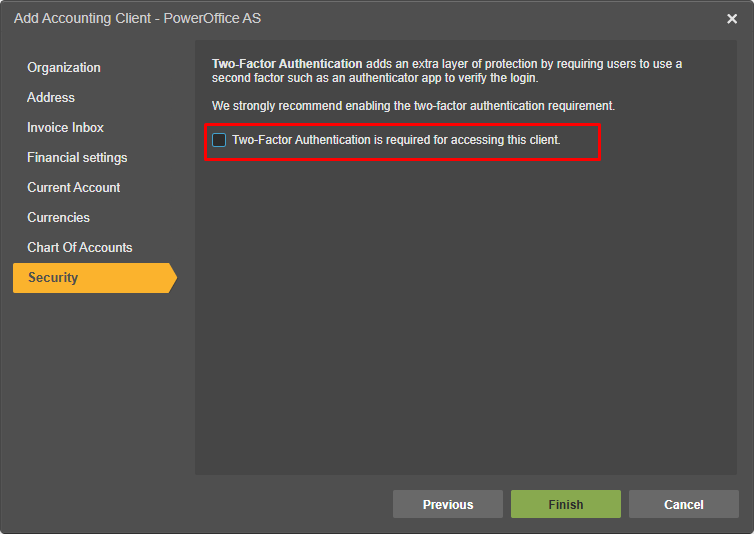
Two-Factor Authentication:
Two-Factor Authentication enhances security by requiring users to provide an additional verification factor, such as an authenticator app, to confirm their login. In the demo environment, we suggest disabling this feature for quicker access. Nonetheless, should you wish to utilize Two-Factor Authentication, applications like Google Authenticator or Microsoft Authenticator are available for use.
Inviting new users to a client:
Users can be granted access to the client by inviting them through Menu - Users - Send invitation.
Enter the email, first name, and last name. If the user is also to be employed by the company, check the corresponding box, and the person will be automatically created in the employee register. Then select the role the person should have and click "send invitation".
